Monday, March 7, 2011

March =

the month we found our house!!

I meant to write a little anniversary post last Thursday, March 3rd, the day we found our house but totally forgot!

Brandon and I looked at several houses before we found "the one." Thanks to an amazing realtor (who was filling in for our initial realtor, who had to have surgery and was out for a few weeks) we realized this little yellow raised ranch was too good to pass up. The previous owner had maintained the utilities impeccably and we just had to see past the horrendous wallpaper and their style of decor.

Just 3 short days after we found the house, we put in an offer and it was accepted! It's crazy how time flies!!

And I still can't believe how this:

transformed into this:


Tuesday, March 1, 2011

Black Bean Stuffed Peppers

Another "first-time Crock Pot recipe!"

The picture on the recipe card:

How mine turned out:


And after cutting into it:

Avalanche!!! It literally exploded as soon as I cut into it - but it was soo good!!

I'm guessing I cooked it too long in the crockpot and that's why pepper shriveled up? (It was literally twice that size when I started)

Anywho, here's the recipe:

Black Bean Stuffed Peppers

1 medium onion, finely chopped
1/4 tsp cayenne pepper
1/4 tsp dried oregano
1/4 tsp ground cumin
1/4 tsp chili powder
1 can (15 ozs) black beans, rinsed and drained
6 tall green bell peppers, tops removed, seeded and cored (I used 3 giant ones instead of 6, which is good, because those 3 barely fit inside!)
1 cup (4 ozs) shredded reduced-fat Monterey Jack cheese (I didn't measure this out, I just sprinkled it over the black bean mixture)
1 cup tomato salsa (again, didn't really measure, just spooned it out)
1/2 cup fat-free sour cream
Chopped fresh chives (I didn't use any)

1. Spray medium skillet with cooking spray. Saute onions until golden. Add cayenne pepper, oregano, cumin and chili powder. Remove from heat.

2. Mash half the black beans with cooked onion in medium mixing bowl. Stir in remaining beans. Place bell peppers in slow cooker; spoon black bean mixture into bell peppers. Sprinkle cheese over peppers. Pour salsa over cheese. Cover; cook on LOW for 6 to 8 hours, or on HIGH for 3 to 4 hours. (I cooked ours for 8 - gonna try just 6 next time!)

3. Serve each pepper with a dollop of sour cream and chopped chives, if desired.

I'm not a fan of spicy foods, and these were definitely HOT, so the sour cream helped to cool things down a bit - I ate every last bite, tho, because it was so yummy!

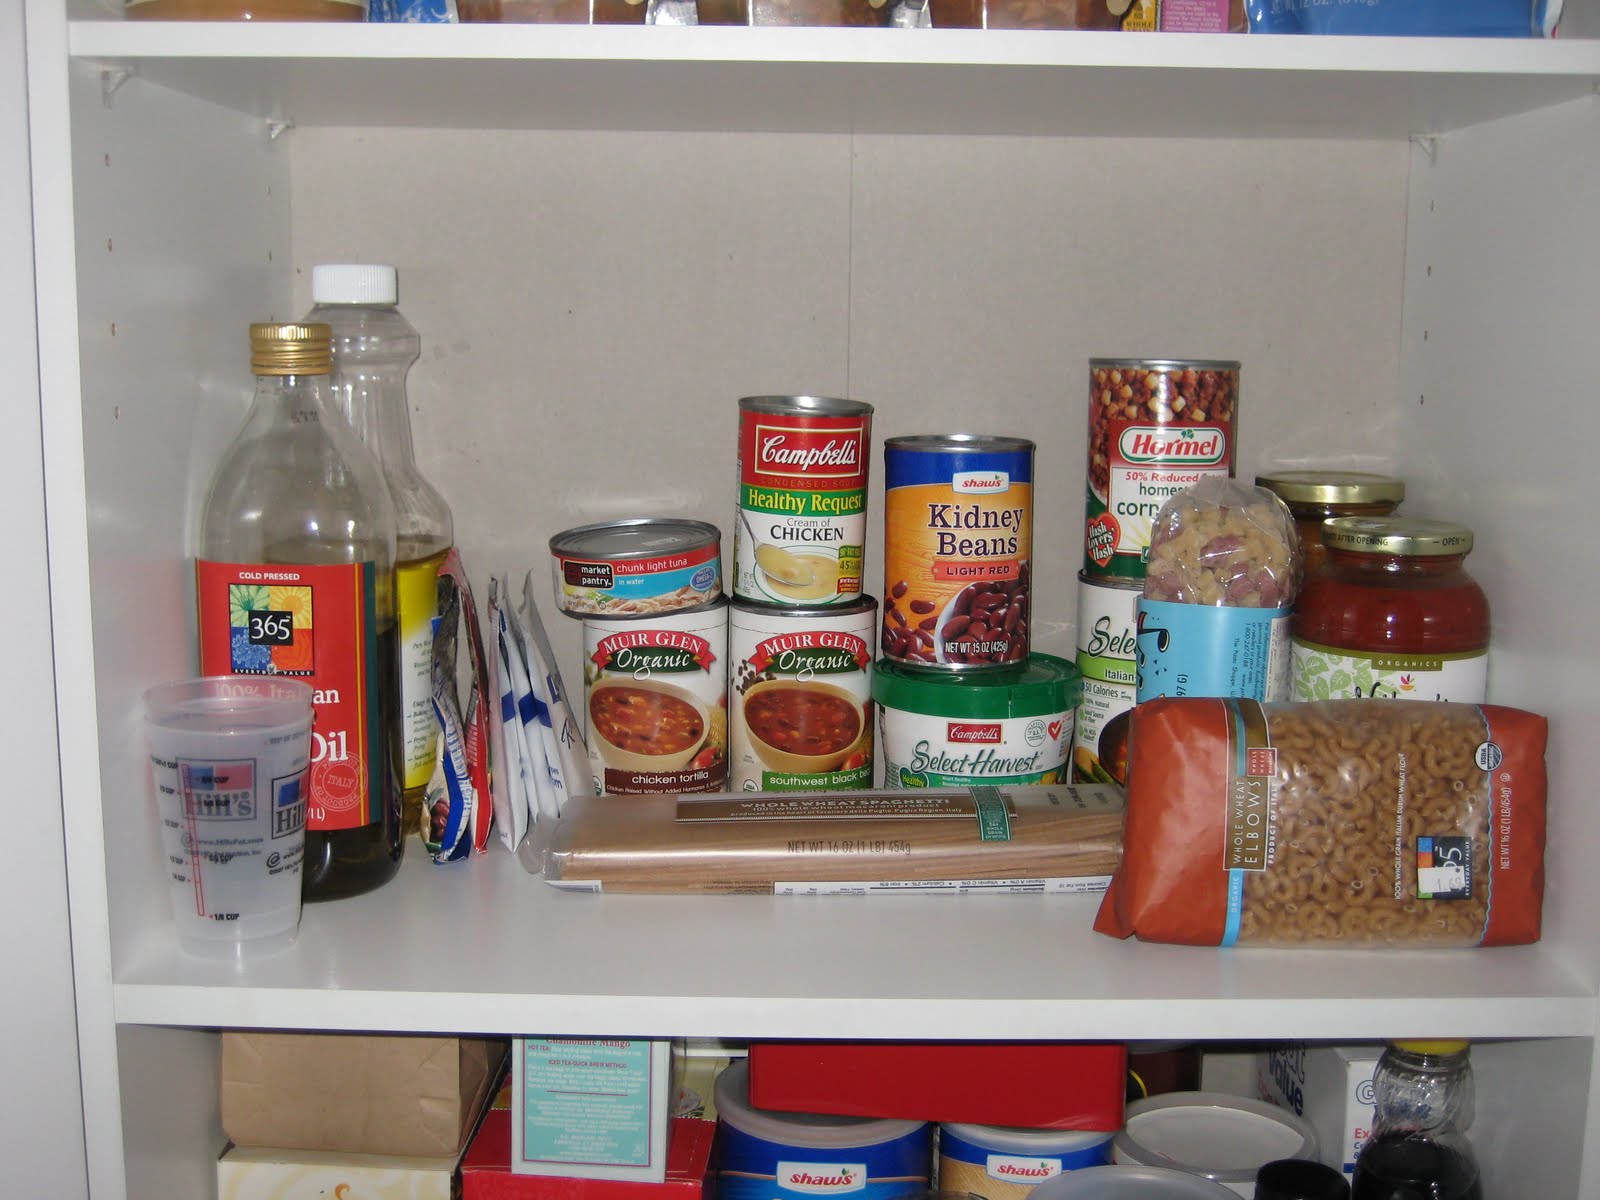
Extreme Makeover: Pantry Edition!

Ok, so it's not that extreme, but I was having trouble thinking of a title for this blog, so just go with it!

As promised, here are some pictures of my mini-pantry makeover from Friday night:


Not the best before picture, because I remembered to snap one AFTER I had already cleared out the top shelf - the third shelf down (mostly baking ingredients) was the worst one of all and I despised looking at it day after day!


This is After picture 1.0 (see below for the final "After")

- I added a bin to the top shelf to corral all of our snack-y type foods (granola bars, popcorn, etc.):


- Cleaned out a bunch of stuff and just kept the things we needed:


- Switched the 3rd and 4th shelf so the baking items (which are the heaviest) are on the bottom:


-I took the wire rack from the 2nd shelf (it's barely visible in the before picture) and added a bin to hold random baking ingredients (shredded coconut, butterscotch chips, Heath bar candy):


I thought this looked pretty good. Then I spent 2+ hours drooling over The Container Store's website. I trekked up to my local store on Saturday and grabbed some more stuff for my pantry makeover. By Sunday, it looked a little something like this:


Top shelf: The only thing I added was a container for granola/cereal, but I was glad to eliminate another box/plastic bag and now I can see how much is left = saving $$


2nd shelf: moved the wire rack back to it's original home, used another clear container like the one on the top shelf to store pasta. Bought this to store spaghetti. Oh, and that white bin that had been on the bottom shelf? Now it's used for this:


Brown rice, gravy and spice packets!


3rd shelf: didn't change too much - just rearranged some items


Bottom shelf: Bought another wire rack to make use of the vertical space, got a smaller bin (actually for spice packets) to hold my random baking items and check out the sugar and flour containers (found here and here) that will make for less messes:


Oh, and I picked up some scoops to use with our cereal canisters (I had been using some old measuring cups - not very aesthetic!) and plopped them in an IKEA vase:


I love having a pantry where I can see everything and find stuff quickly!

I'm still planning to do a switcheroo with our lower cabinets, but I need to sort it out a bit, draw some sketches, take some measurements before I pay another visit to my new BFF, The Container Store!!


Saturday, February 26, 2011

A little preview of things to come

I only have 15 mins before some of my best gals pick me up for a game night at our friend's place, so this is really a half a post. I spent 3.5 hours last night working on organizing our kitchen. I still have some cabinets to clean out/rearrange, but I'm so happy with the results so far. Here are the befores/afters of 3 of our 4 drawers (the 4th one holds silverware in a nice and tidy flatware organizer!)

Before

After

Before

After
(I switched around the contents of this drawer so the stuff we use a lot was closer to the stove)

Before

After


It's amazing what some drawer organizers can do!! Now I will never go searching for my measuring cups/spoons again! I also threw out a bunch of stuff we didn't use anymore and moved some other stuff (take out menus/small appliance manuals) to other areas in the kitchen

Oh, and there's no before picture, but check out what our fridge looks like, now that I've done a major purge of old food/unnecessary items!


Now when I open the fridge I can actually SEE what's inside! Time to go food shopping!!

Stay tuned for pics/updates of my pantry project and operation cabinet switchover!

Tuesday, February 22, 2011

Great finds at Target today!


I love when I go into Target for a couple of items and walk out with things not even on my list - however, I just couldn't pass up these 3!

So I was wanting to update our formal living room a bit, specifically the slipcover for the couch

Here's how the couch came to us:


Then we transformed it to this:

(Dark brown slipcover I bought a few years ago at Target)

And now, thanks to, yet again, a fabulous deal at Target, this hand-me-down couch is sporting a brand new look:


The slipcover is this:

Which technically is a bit too small for our "couch" (which is sort of like an oversized loveseat I guess, because it only has 2 cushions?) However, even tho it is a bit small, I couldn't pass it up. Here's a closeup of that Clearance tag:


Yes, that's right, originally $90 and I got it for under $23!!!! I love the color and the texture and the fact that it's Scotchguard protected!

Ok, onto more deals-

One of my New Year's resolutions is to get organized. My good friend Tracy over at TEM's New Beginnings passed along this awesome blog: IHeart Organizing. I've been reading it almost non-stop since last night! Jen is so inspiring and has some amazing ideas!

After perusing the clearance section in a few more departments, I found 2 items that I knew would be just the thing to kickstart my resolution: a mail organizer and a mesh basket.


I can never manage to find envelopes, thank you notes, pens, stamps, return address labels, etc when I need them! So I bought this cute little mail station thingie to hold everything.

Speaking of never being able to find things, under the sink in our full bath was screaming for a makeover, and that's where the mesh basket comes in! (I totally forgot to take a before picture, but just imagine bottles of bathroom/toilet cleaner aimlessly strewn about, plus tons of half used shampoo/conditioner bottles and other odds and ends we just didn't need.)

Here's the after:

Left side (ignore the ugly pipes and even uglier contact paper - project for the summer!)


Right side

Angle shot so you can see the whole thing

I did the same thing under our kitchen sink about a month and a half ago and it has made a HUGE difference being able to find exactly the right cleaner when I need it, without having to pull everything out and waste time, when I could be cleaning!

Oh, and here's what I paid for the desk organizer and basket:


I love savings!!!! And I especially love Target :)

Chipotle Chicken Stew

Came out awesome!!!

I ended up heating some brown rice, threw it in a bowl, added the stew, stirred everything together and voila:


It didn't turn out as spicy as I thought it might - which is fine, because I prefer mild food anyway, but my husband likes things HOT! So next time I'll either add another chipotle pepper, or more cumin, or both!

Oh, and here's the recipe:

Chipotle Chicken Stew (from the Crock Pot recipe card collection)

1 pound boneless, skinless chicken thighs, cut into cubes
1 teaspoon salt
1 teaspoon ground cumin
1 bay leaf
1 chipotle pepper in adobo sauce, minced (they sell these in a can - I hated having to buy the whole can for 1 pepper, but it wasn't so bad when I realized the can was only $.60)
1 medium onion, diced
1 can (15 ounces) navy beans, rinsed and drained
1 can (15 ounces) black beans, rinsed and drained
1 can (14 1/2 ounces) crushed tomatoes, undrained (The can I had was 28 ounces, so I just measured out 14 1/2 - also, I couldn't find any other size but 28 ozs in the store - weird)
1 1/2 cups chicken broth
1/2 cup orange juice
Cilantro sprigs (optional - I didn't include this)

1. Combine chicken, salt, cumin, bay leaf, chipotle pepper, onion, beans, tomatoes with juice, broth and orange juice in 3- to 6-quart Crock-Pot slow cooker (Ours is actually a Hamilton Beach model but works just fine!)

2. Cover; cook on LOW for 7 to 8 hours, or on HIGH for 3 1/2 to 4 hours. (I cooked ours on low for just over 7 hours) Remove bay leaf before serving. Garnish with cilantro sprigs, if desired.

Makes 6 servings - Ours fed 3 people (our guest had a 2nd helping and there is still a little left in the crock pot. Not sure what an actual "serving size" is)

My husband and his friend loved it! His friend said it reminded him of a chili.

Oh, and here is how I set the table:

I realized I have very few runners, so I improvised and layered some paisley placemats I bought at the Christmas Tree Shop a few years ago


That's a better picture of the placemats upclose (and Brandon's bowl - he didn't realize how much brown rice he added - oops!)

Can't wait to try out some more recipes over the next few weeks - this one is definitely a keeper!!!

Here's what I'm tackling today:


And here are all my ingredients lined up ready to go:

I'm annoyed I had to actually buy a little thing of OJ (we don't regularly drink it/have it in our fridge) but at least it's a good kind. I'm glad I already had a can of crushed tomatoes (which I bought awhile ago - don't worry, expiration date isn't til May!)

I'll update when it's all cooked!